Configuring DDNS on a Hikvision NVR
A common request we receive when installing a HikVision NVR for a camera security system is to enable access to the NVR’s web interface from outside of the customer’s network or site. This is convenient for viewing the live video from a remote location as well as looking at recorded events remotely. And typically this is easily done through the NVR’s web interface on port 443.
One thing that typically complicates this setup is if the customer has a dynamic IP address on their WAN interface. This is easily remedied by using the built-in DDNS client. The DDNS client will automatically update the FQDN from the supported DDNS service with the new WAN IP address each time it changes. That way you never have to worry about what the new address is, you just need to remember your FQDN.
By default, Hikvision supports DDNS service from these 3 providers:
- DYNDNS
- NO-IP
- PeanutHull
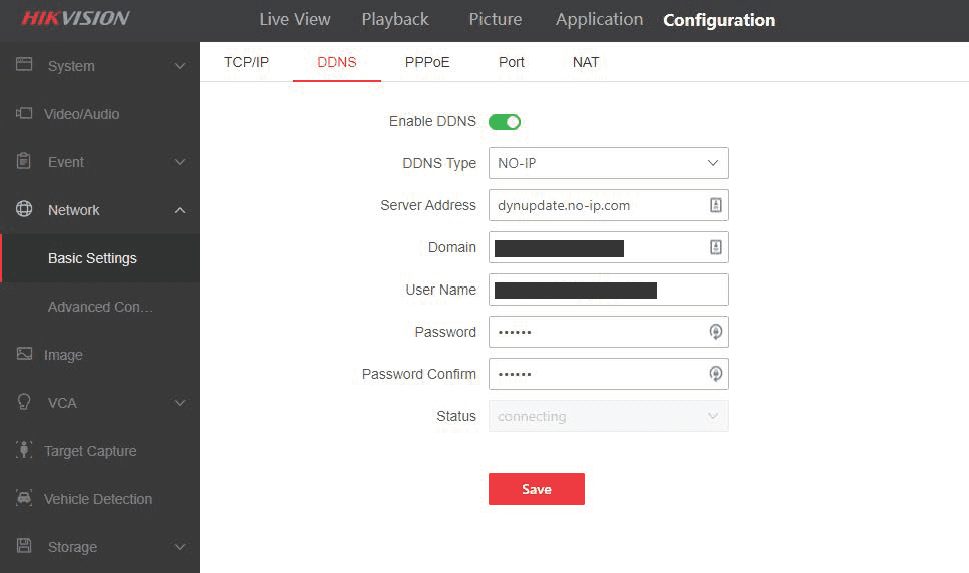
In this example, I will show you how to configure the NO-IP DDNS service with your NVR.
- Log into your NVR and navigate to Network > Basic Settings > DDNS
- Slide the toggle to enable DDNS
- Choose NO-IP from the DDNS type drop down (If you want to configure another provider you can do so).
- Enter the NO-IP server address: dynupdate.no-ip.com
- Enter your custom FQDN in the domain field. Example: myfqdn.ddns.net
- Enter your NO-IP account username and password.
- Click save.

Home » Configuring DDNS on a HikVision NVR


