In this article I will be outlining how you can control the bandwidth usage for certain applications. You may find that when certain applications access data in the cloud, that the application may use excessive amounts of bandwidth. This excessive amount of bandwidth usage can negatively effect the performance of your network.
In this example, the application for which I want to limit bandwidth usage is for MSP Backup (N-able). I would like to limit the application to 5 Mbps of total bandwidth usage and I only want that limitation to occur duringr business hours (9am to 5pm).
-
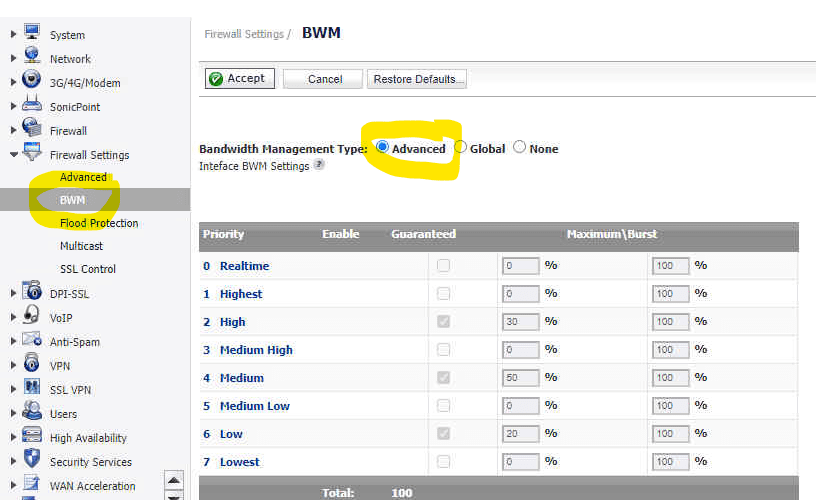
First, we need to enable Advanced Bandwidth Management (BWM) by going to Firewall Settings>>BWM>>Choose Advanced.
-
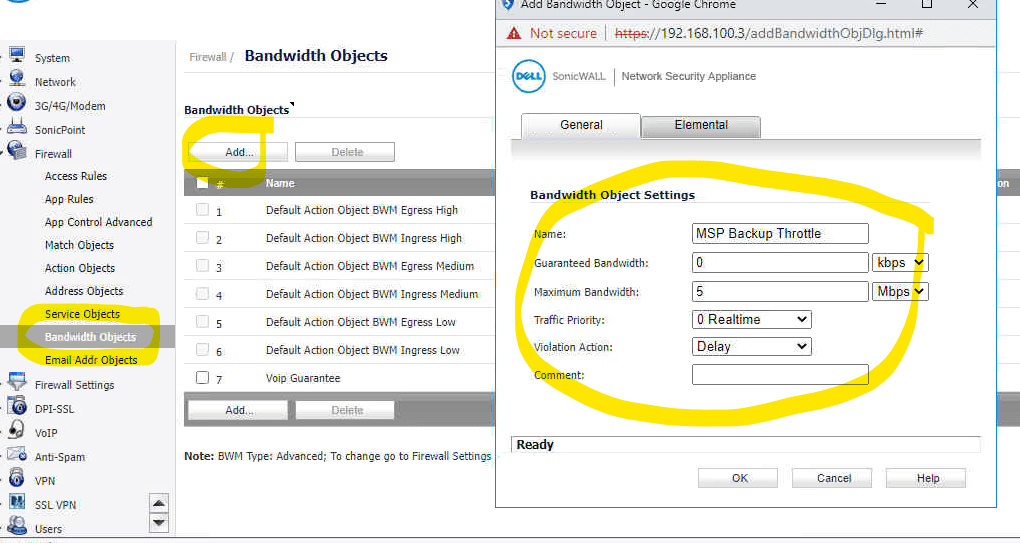
Now we need to create a bandwidth object that defines the maximum allowed bandwidth for this application. If you want specify a different amount of bandwidth for ingress and egress traffic, then two bandwidth objects need to be defined. In this example we will be limiting the backup application to 5Mbps for both ingress and egress traffic so just one bandwidth object is required. Navigate to Firewall>>Bandwidth Objects>>Click Add. Provide a descriptive name to your object, set the Guaranteed Bandwidth to 0kbps and the Maximum Bandwidth to 5Mbps. Traffic priority should be set to 0 Realtime and the Violation Action should be set to delay.
-
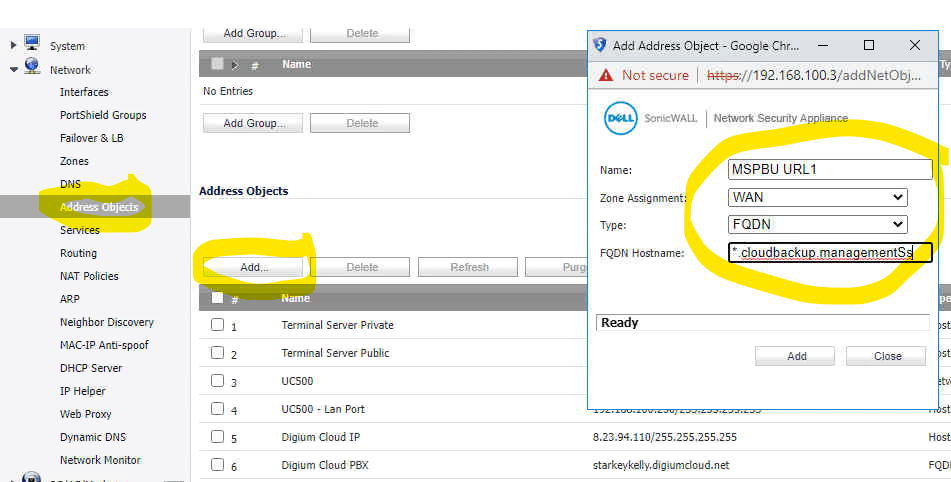
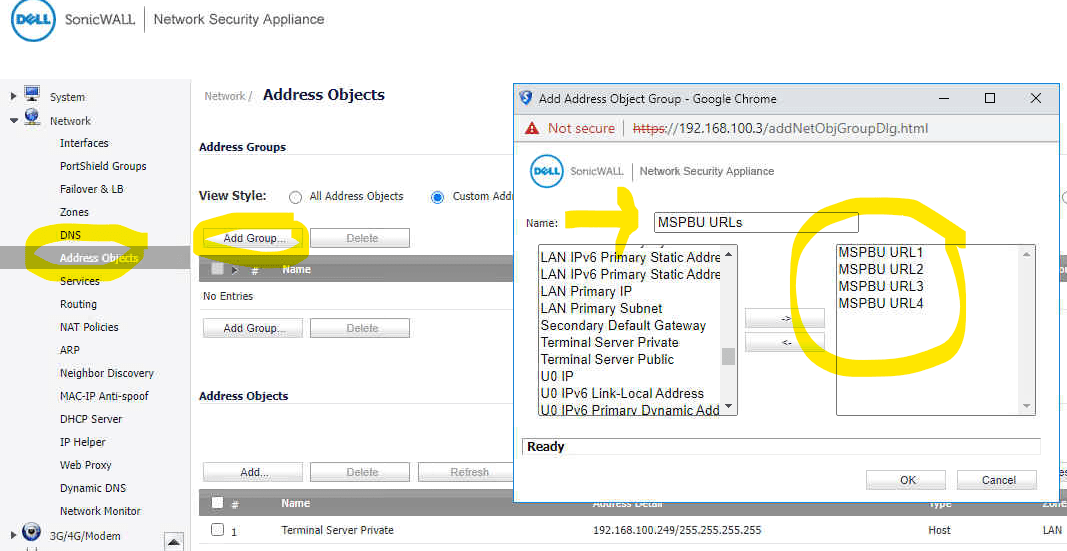
Now we must create an address object for each URL that the program utilizes. I was able to find the URLs that this application uses here. In this example I will need to create 4 address objects since there are 4 URLSs that the application uses. Browse to Network>>Address Objects and select Add.
Here are the four URL’s I will need to add (Wildcards are permitted):
- *.cloudbackup.management
- *.iaso.com
- *.backup.management
- *.mob.system-monitor.com
- Since we added more than one address object in the previous step, we need to add each object to an Address Object Group for better organization. Navigate to Network>>Address Object and click Add Group. Give the group a name and add all of your address objects created in the previous step.
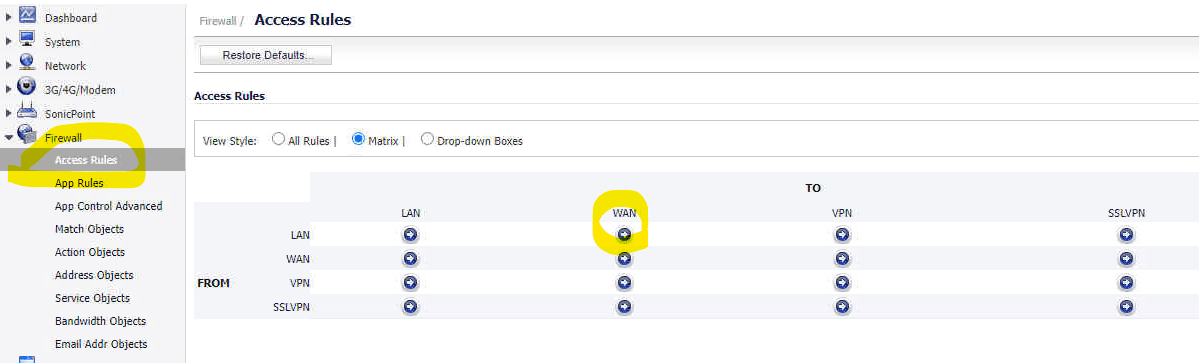
- The bandwidth settings are applied to a firewall rule. And since we are limiting bandwidth that an internal access can utilize while accessing URL’s on the internet, we must create a LAN to WAN firewall rule. To do so, navigate to Firewall>>Access Rules choose Matrix and select LAN to WAN.
-
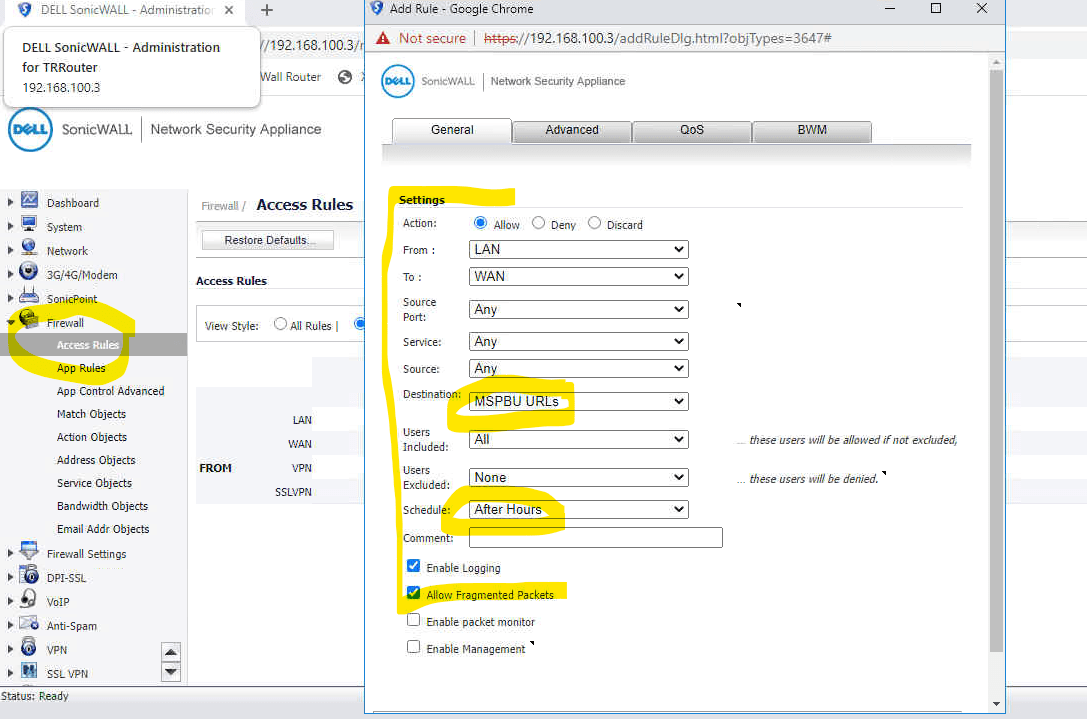
Click add rule and create your firewall rule as shown below. Your source port, service and source will all be ANY. Your destination will be your Address Object Group and for schedule I will use the built-in Work Hours Schedule since I would like this bandwidth rule to apply during business hours. (Modify your schedule as needed).
-
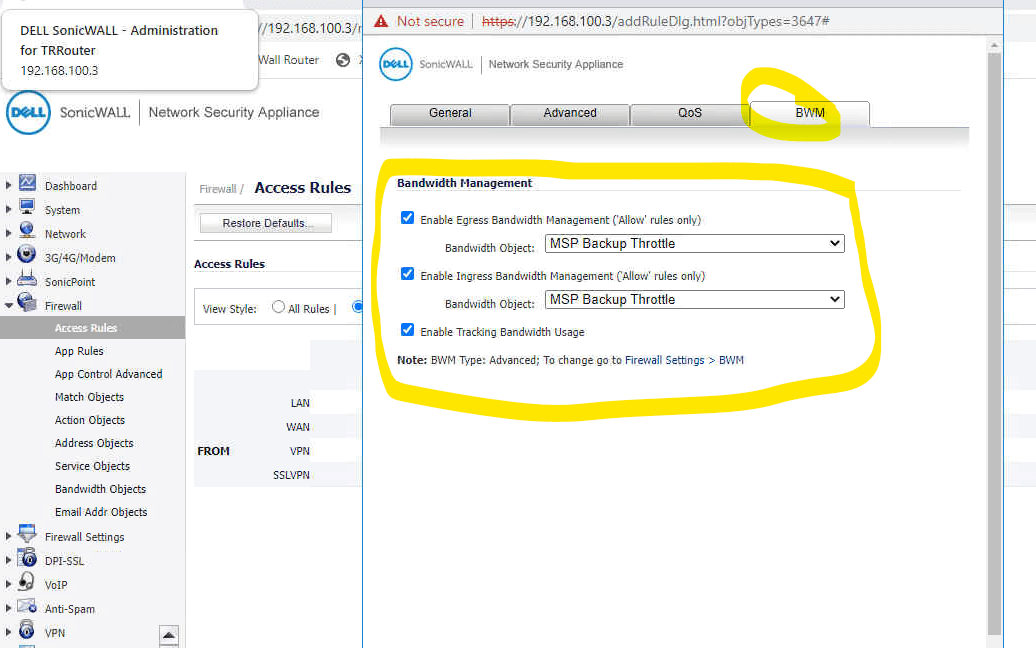
On the BWM Tab, specify the BWM objects created in step 2.
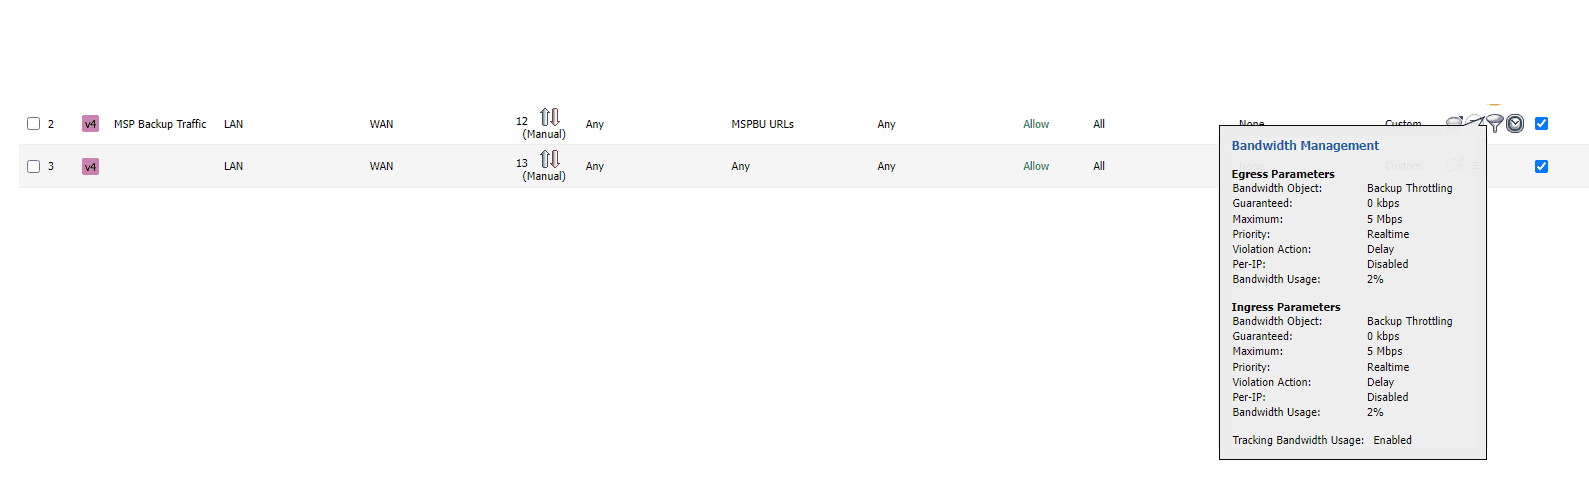
- Once saved, you will see the filter icon and schedule icon next to your firewall rule. Hovering over the filter icon will show you the statistics of the throttled traffic in real time.