One of the biggest changes to Windows 10 has been the Windows Update process. Windows updates are now delivered as an UaaS (Update as a Service) platform meaning that updates are rolled out as cumulative updates on a regular basis, and you are unable to opt out of the service.
These cumulative updates also include operating system updates:
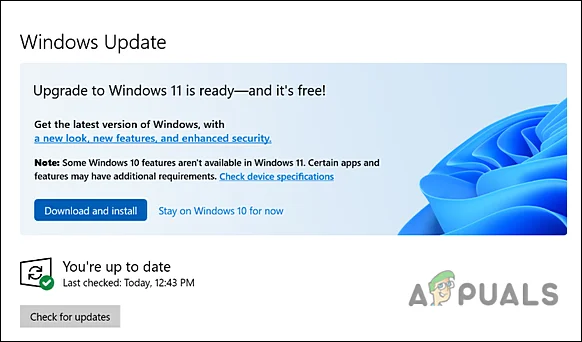
But fortunately, you can still permanently disable the update that will automatically upgrade your Windows 10 operating system to Windows 11 via the registry. Here is how.
Modify Windows Registry
If you want to cancel the Windows 11 update, you can modify the Registry Editor in Windows. However, we recommend creating a Registry backup before you proceed, just to be safe.
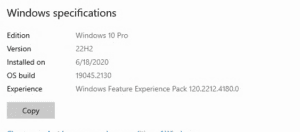
- The first step is to check the current version of Windows that you are using. For that, press Windows + I keys simultaneously on your keyboard to open Windows Settings.
- In the Settings window, select System from the list of options available.
- Now select About from the left panel and scroll down to the ‘Windows specifications’ in the right window.
- You can now check the current version of Windows 10. Take note of your current version.
- Press Windows + R keys simultaneously on your keyboard to open a Run dialogue box.
- In the text field of the dialog box, type regedit and hit Enter to launch Windows Registry.
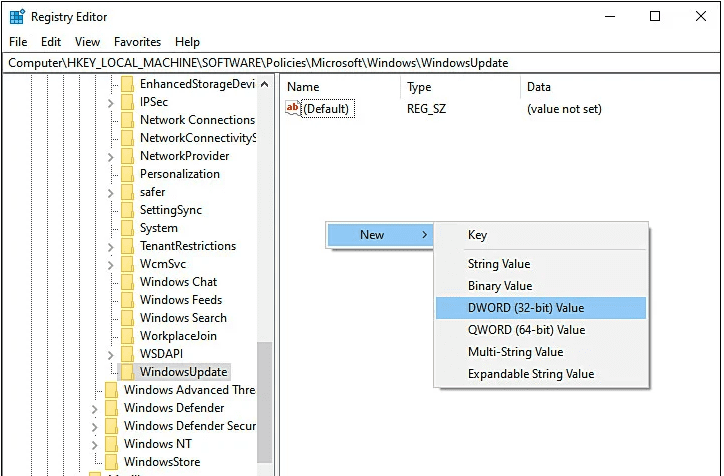
- Once you are inside the Registry Editor, navigate to the location mentioned below.
- If you cannot locate the WindowsUpdate key, then right-click on the Windows key and select the New > Key option.
- Rename this newly created key as WindowsUpdate.
- Now double-click on WindowsUpdate and right-click anywhere in the right pane.
- Select the New > DWORD (32-bit) Value option and rename this value as TargetReleaseVersion.
- Next, double-click on the TargetReleaseVersion value, and under Value data, type 1.
- Once done, right-click anywhere in the same window again and this time, select the New > String Value option.
- Rename this value as TargetReleaseVersionInfo and double-click on it.
- If you are on Windows 10 version 21H2, then type 21H2 under Value data and hit Enter.
- Once done, restart your computer to cancel Windows 11 update.
That is all there is to it. Now you will stay on the current operating system version.